What This Guide Covers
This step-by-step guide will show you how to connect your Gift Reggie app with Klaviyo (a powerful email marketing platform) using Shopify Flow. By the end of this guide, you'll be able to automatically send personalized emails to your registry customers based on their actions.
Understanding the Tools
Before we begin, let's understand what each tool does:
What is Klaviyo?
Klaviyo is an email marketing platform that helps you send personalized, automated emails to your customers. It's more powerful than basic email tools because it tracks customer behaviour and sends highly targeted messages.
What is Shopify Flow?
Shopify Flow is the "connector" that makes Gift Reggie and Klaviyo work together. Think of it as a messenger that says: "Hey Klaviyo, someone just created a registry, send them a welcome email!"
How They Work Together
- Something happens in Gift Reggie (e.g., a customer creates a registry)
- Shopify Flow notices and passes the information to Klaviyo
- Klaviyo receives the data and triggers your pre-designed email campaign
What You'll Need
Before starting, make sure you have:
- ✅ Gift Reggie app installed on your Shopify store
- ✅ Klaviyo account (free plan works fine to start)
- ✅ Klaviyo app installed in your Shopify store
- ✅ Shopify Flow
Don't have Klaviyo yet? Visit klaviyo.com and sign up for a free account, then install the Klaviyo app from the Shopify App Store.
Part 1: Setting Up the Connection in Shopify Flow
Step 1: Access Shopify Flow
- Log in to your Shopify Admin
- Go to Settings (bottom left corner)
- Click Apps and sales channels
- Find and open Shopify Flow
- Click the Create workflow button
Step 2: Choose Your Gift Reggie Trigger
- In the workflow builder, click Select a trigger
- In the search box, type "Gift Reggie"
- You'll see a list of available triggers. Choose the one you want to use.
Example triggers you might choose:
- Registry Created - to send a welcome email when someone creates a registry
- Registry Event Upcoming - to send a reminder email before the event date
- Registry Order Placed - to thank gift givers after they purchase from a registry
For this guide, let's use "Registry Created" as an example.
Step 3: Add the Klaviyo Action
- Click the + button below your trigger
- Select Action
- In the search box, type "Klaviyo"
- Choose "Klaviyo - Track an event"
This action logs a custom event in Klaviyo that you can use to trigger specific email flows. For example, when someone creates a registry, this will track a "Registry Created" event in Klaviyo, which can then trigger a welcome email series.
Step 4: Configure the Klaviyo Action
After selecting "Klaviyo - Track an event", you'll need to fill in these fields:
1. Email Address
- Click in the field and select Customer email from the dropdown
- This tells Klaviyo which customer to track this event for
2. Event Name
- Give your event a clear, descriptive name
- Example: "Registry Created" or "GiftReggie_RegistryCreated"
- Important: Use the same event name consistently—you'll need it later in Klaviyo
3. Event Properties (Optional but Recommended)
This is where you can send additional information to Klaviyo. Click Add property and include useful details like:
- Registry Name: The name of the registry
- Event Type: Wedding, Baby Shower, Birthday, etc.
- Event Date: The date of the registry event
- Registry URL: Link to view the registry
- Items Count: Number of items in the registry
How to add properties:
- Click Add property
- In "Property name", type the label (e.g., "RegistryName")
- In "Property value", select the corresponding data from the dropdown
- Repeat for each piece of information you want to send
Pro Tip: The more information you send, the more personalized your emails can be!
Step 5: Name and Activate Your Workflow
- At the top of the page, click on "More actions -> Rename"
- Give it a clear name like "Registry Created → Klaviyo"
- Review your workflow to make sure everything looks correct
- Click Turn on workflow (top right corner)
Congratulations! Your Shopify Flow workflow is now active and will send data to Klaviyo whenever someone creates a registry.
Part 2: Setting Up Email Campaigns in Klaviyo
Now that Flow is sending data to Klaviyo, you need to create email campaigns that respond to these events.
Step 1: Access Klaviyo
- Log in to your Klaviyo account (klaviyo.com)
- You'll see your main dashboard
Step 2: Create a New Flow in Klaviyo
- Click Flows in the left sidebar
- Click Create Flow (top right)
- Choose Build Your Own
- Give your flow a name like "Registry Welcome Series"
Step 3: Set Up the Trigger
- Click on the Trigger block (it says "Your metrics")
- Under Shopify List, select the exact event name you used in Shopify Flow
- Example: "Registry_Created"
- The trigger is now configured!
Don't see your event? Make sure:
- Your Shopify Flow workflow is turned on
- Someone has created a test registry to trigger the event
- You're using the same event name (case-sensitive!)
Step 4: Add Email Actions
- Select Email
- Click Select Template to design your email
Designing Your Email
Subject Line: Use personalization to make it engaging:
- "Welcome {{ first_name }}! Let's set up your {{ event.EventType|default:'registry' }}"
- "Your {{ event.RegistryName }} is ready to share!"
Email Body: Click Edit in template editor and design your email. You can use:
- Drag-and-drop blocks (text, images, buttons)
- Pre-made templates
- Custom HTML (if you're comfortable with code)
Adding Personalization: To include registry information in your email:
- Click where you want to add personalized text
- Look for "Personalization" or "Add variable" button
- Select the property you want to insert:
{{ first_name }}- Customer's first name{{ event.RegistryName }}- Registry name{{ event.EventDate }}- Event date{{ event.RegistryURL }}- Link to the registry
Example Email:
Hi {{ first_name }},

Congratulations on creating your {{ event.EventType }} registry!

Your registry "{{ event.RegistryName }}" is all set up for {{ event.EventDate }}.
Here's what you can do next:

1. Add more items to your registry
2. Customize your registry settings
3. Share it with friends and family

[View Your Registry Button]

Need help? We're here for you!

Best regards,
[Your Store Name]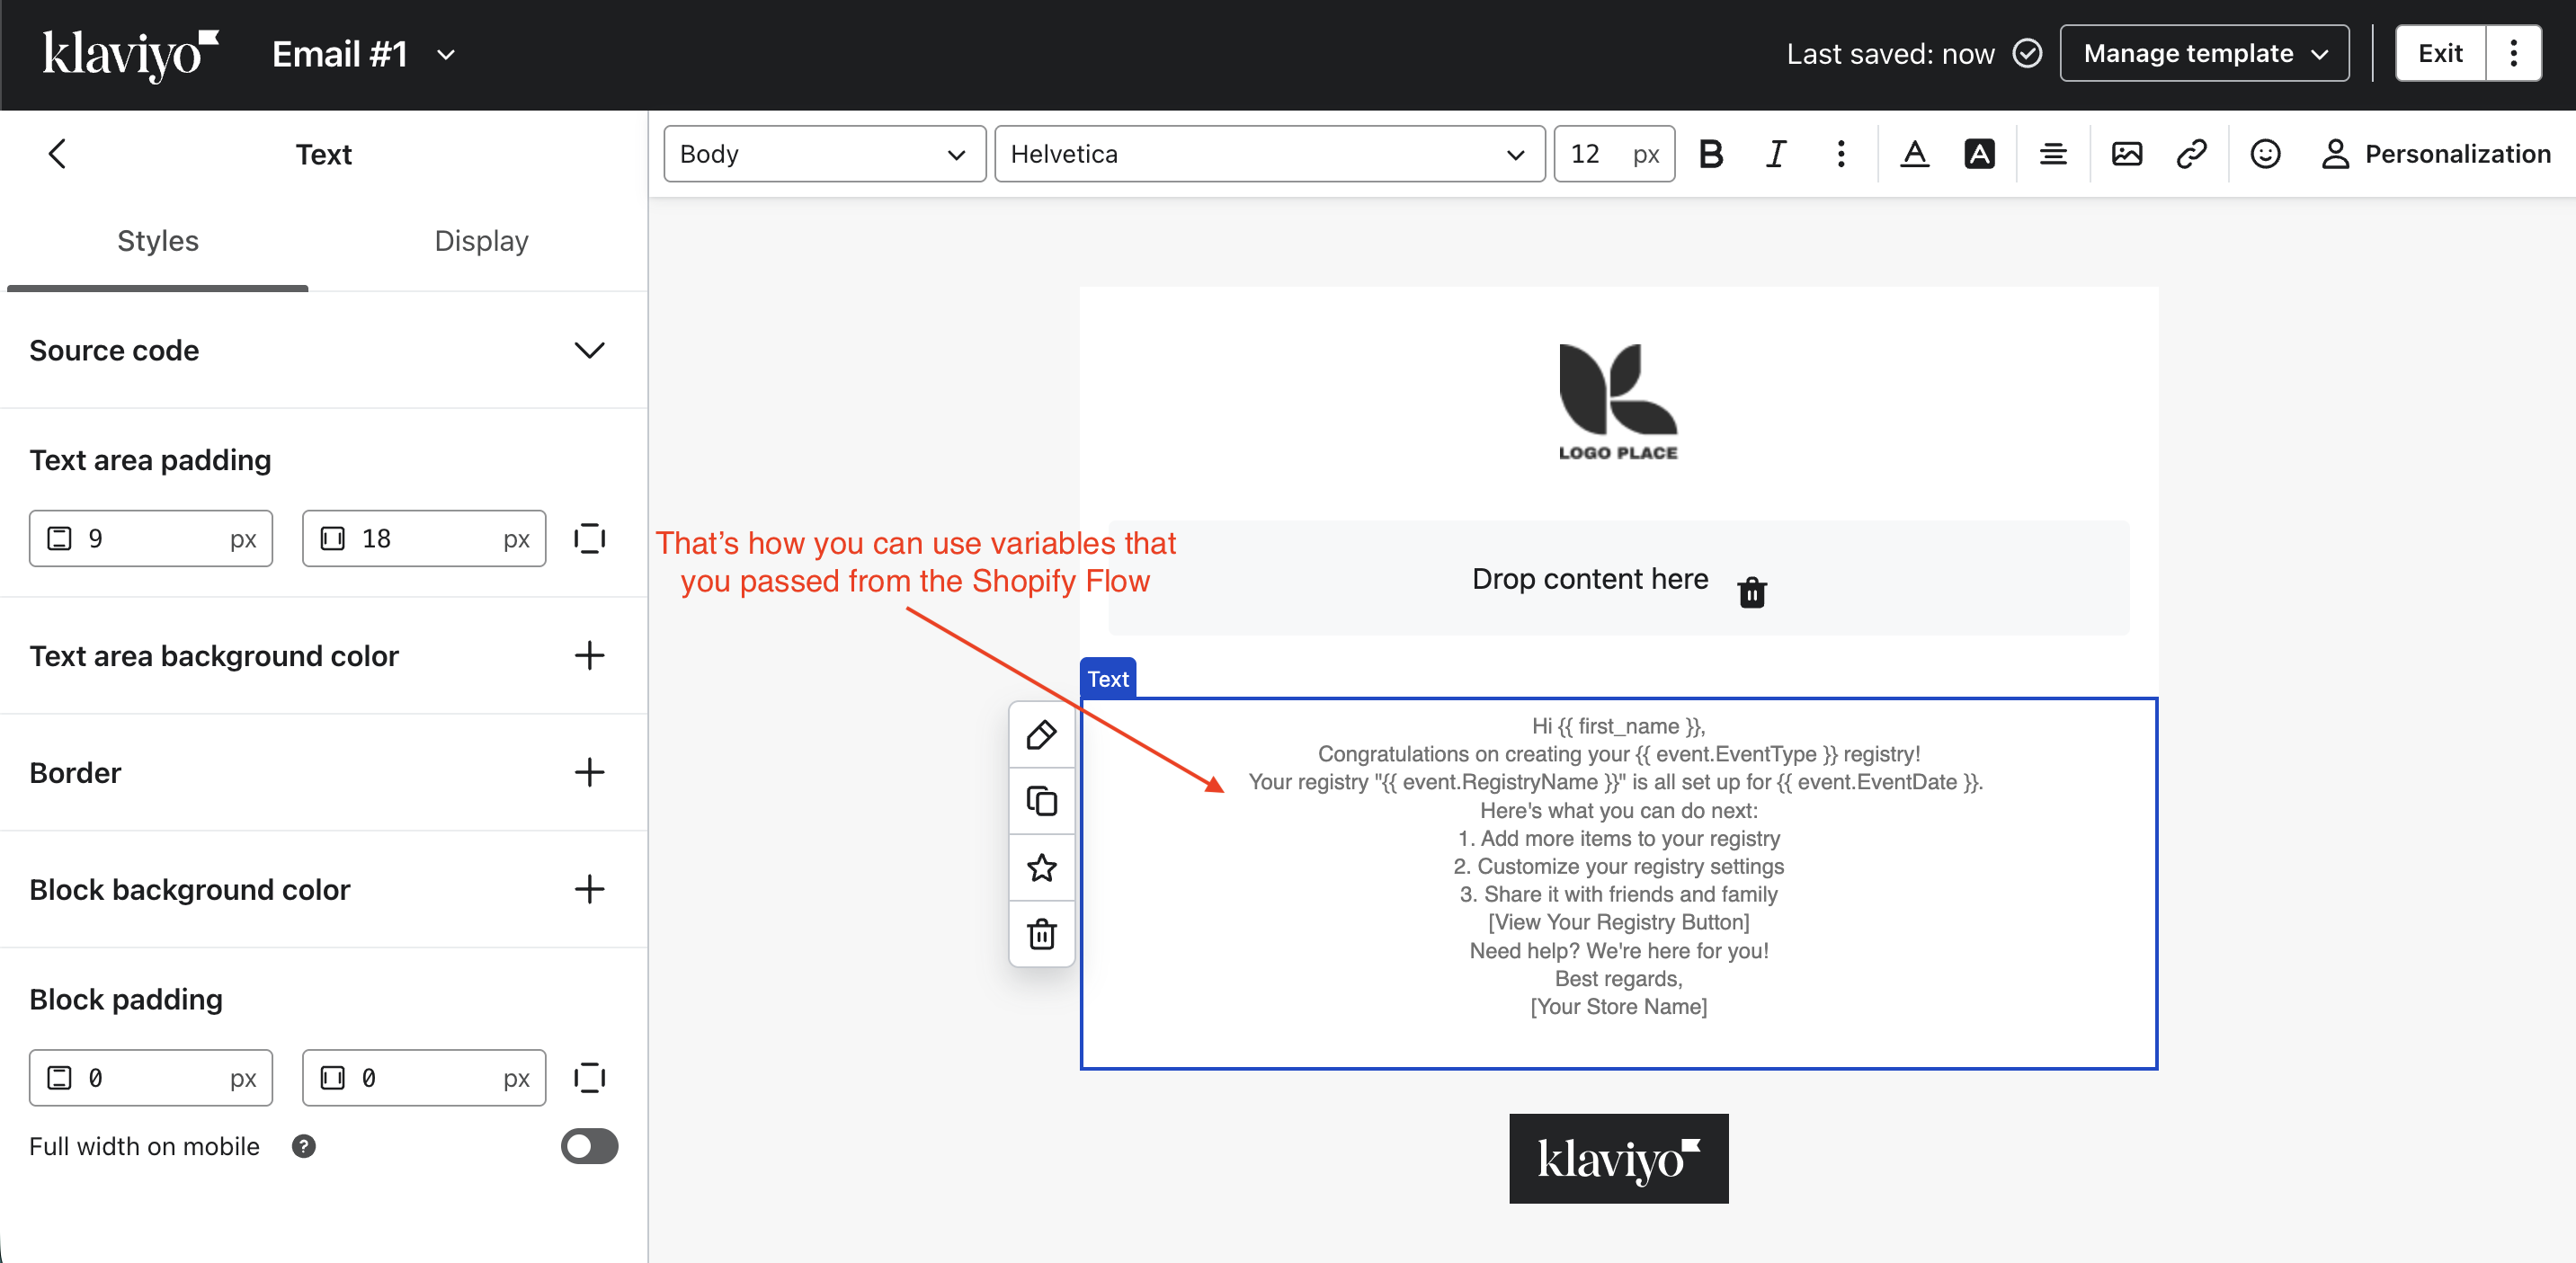
Step 5: Review and Activate
- Click Review and Turn on to see your full flow
- Check for any errors or warnings
- Click Save to activate your flow
Important: Test your flow first by creating a test registry in your store and checking if the email arrives!
Setting Up Multiple Klaviyo Flows for Different Triggers
You can create separate Shopify Flow workflows and Klaviyo flows for each Gift Reggie triggers. Here's a recommended setup:
Essential Flows to Create
1. Registry Welcome Flow
- Shopify Flow Trigger: Registry Created
- Klaviyo Event: "Registry Created"
- Emails: Welcome email, setup tips, sharing guide
2. Event Reminder Flow
- Shopify Flow Trigger: Registry Event Upcoming
- Klaviyo Event: "Registry Event Upcoming"
- Emails: Event reminder, last chance to share registry
3. Post-Purchase Thank You
- Shopify Flow Trigger: Registry Order Placed
- Klaviyo Event: "Registry Order Placed"
- Emails: Thank you to gift giver, purchase confirmation
4. Event Day Celebration
- Shopify Flow Trigger: Trigger When Registry Event Ongoing
- Klaviyo Event: "Registry Event Day"
- Emails: Congratulations message, special offer
5. Post-Event Follow Up
- Shopify Flow Trigger: Trigger After X Days of Event Date (set to 7 days after)
- Klaviyo Event: "Registry Post Event"
- Emails: Thank you, feedback request, remaining items discount
Troubleshooting Common Issues
Problem: Event not showing up in Klaviyo
Solutions:
- Make sure your Shopify Flow workflow is turned ON
- Verify Klaviyo app is properly connected to Shopify
- Create a test registry to trigger the event
- Wait 5-10 minutes for the event to appear in Klaviyo
- Check that event names match exactly (case-sensitive)
Problem: Emails not sending
Solutions:
- Confirm your Klaviyo flow is set to "Live" (not draft)
- Check that your email is fully designed and approved
- Verify the customer's email address is valid
- Look for error messages in Klaviyo's flow analytics
Problem: Wrong information in emails
Solutions:
- Double-check property names in Shopify Flow match what you're using in Klaviyo
- Use
{{ event.PropertyName }}format in Klaviyo (not just{{ PropertyName }}) - Test with a real registry to see what data is actually being sent
Problem: Duplicate emails being sent
Solutions:
- Check that you don't have multiple flows with the same trigger
- In flow settings, enable "Smart sending" to prevent over-emailing
- Review your flow conditions to ensure they're not too broad
Need Help?
Gift Reggie Support: Contact our support team for help with app-specific questions
Klaviyo Support: Visit help.klaviyo.com or contact their support team
Shopify Flow Support: Visit help.shopify.com/en/manual/shopify-flow
Appendix: Complete List of Gift Reggie Triggers
Here's a reference of all 12 triggers you can use with Klaviyo:
- Registry Created - When a customer creates a new registry
- Registry Closed - When a registry is marked as closed
- Registry Reopened - When a registry is reopened
- Registry Order Placed - When someone purchases from a registry
- Registry Shared - When a customer shares their registry
- Trigger After X Days of Registry Created - X days after creation
- Trigger After X Days of Event Date - X days before/after event
- Registry Event Upcoming - X days before the event
- Trigger When Registry Event Ongoing - On the event day
- Wishlist Created - When a customer creates a wishlist
- Wishlist Shared - When a customer shares their wishlist
Remember: The X days value can be configured in Gift Reggie settings (Preferences → Settings → Email & Notifications → Relative Days for Notifications and Flow) (default: 14 days)
This guide is designed to help you maximize the power of Gift Reggie and Klaviyo together. We're here to help you succeed!